Sampled amp models
Load amp models and shape them with Gain and amp EQ. A/B/C snapshots each retain their own amp and effect settings.
AMP MODELINGTONE GOD PLAYER / v0.19.1
Load NAM amp models and IRs, then build your effects chain.
From rhythm drive and pitch shifts to ambient tails, give every part its own sound.
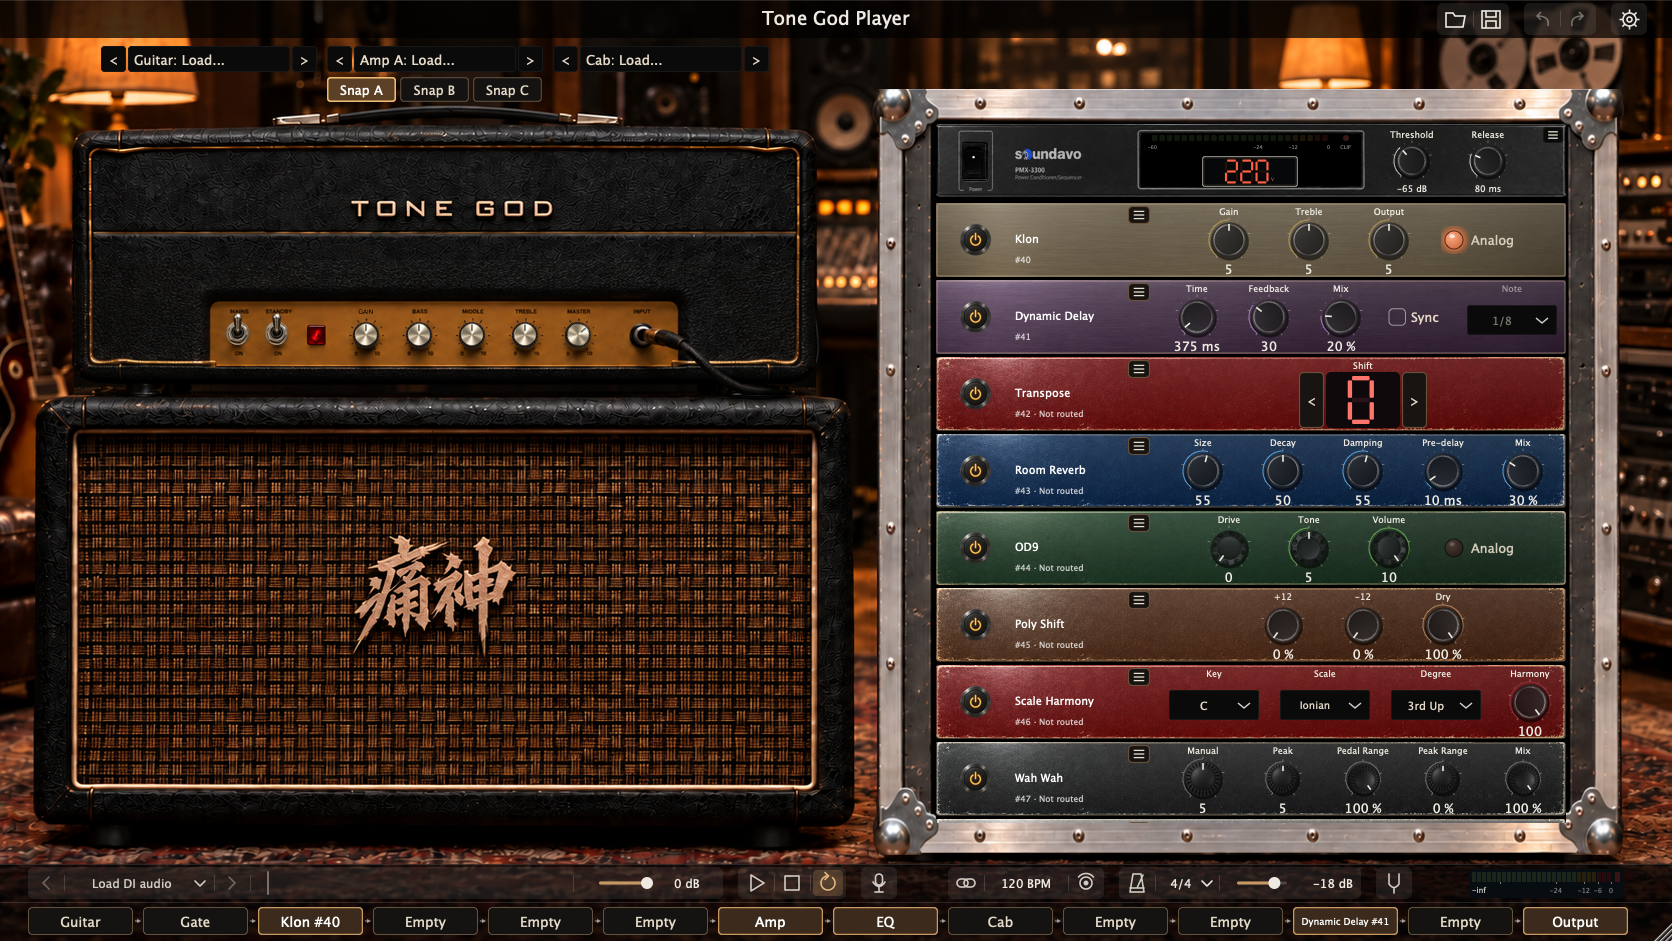
Load your models and IRs. Arrange your signal chain.
Fine-tune your sound and switch it as you play.
Load amp models and shape them with Gain and amp EQ. A/B/C snapshots each retain their own amp and effect settings.
AMP MODELINGShape your sound with Guitar IR and Cab IR in WAV or AIFF format. Add IR Reverb to explore acoustic spaces.
IMPULSE RESPONSE35 effects cover drive, dynamics, modulation, pitch shifting and reverb. Add, duplicate and reorder them, then assign them to eight effects routing positions.
MODULAR EFFECTSFrom pushing an amp with Klon to pedal-controlled Power Shift. Start with a playing idea, then build the chain around it.
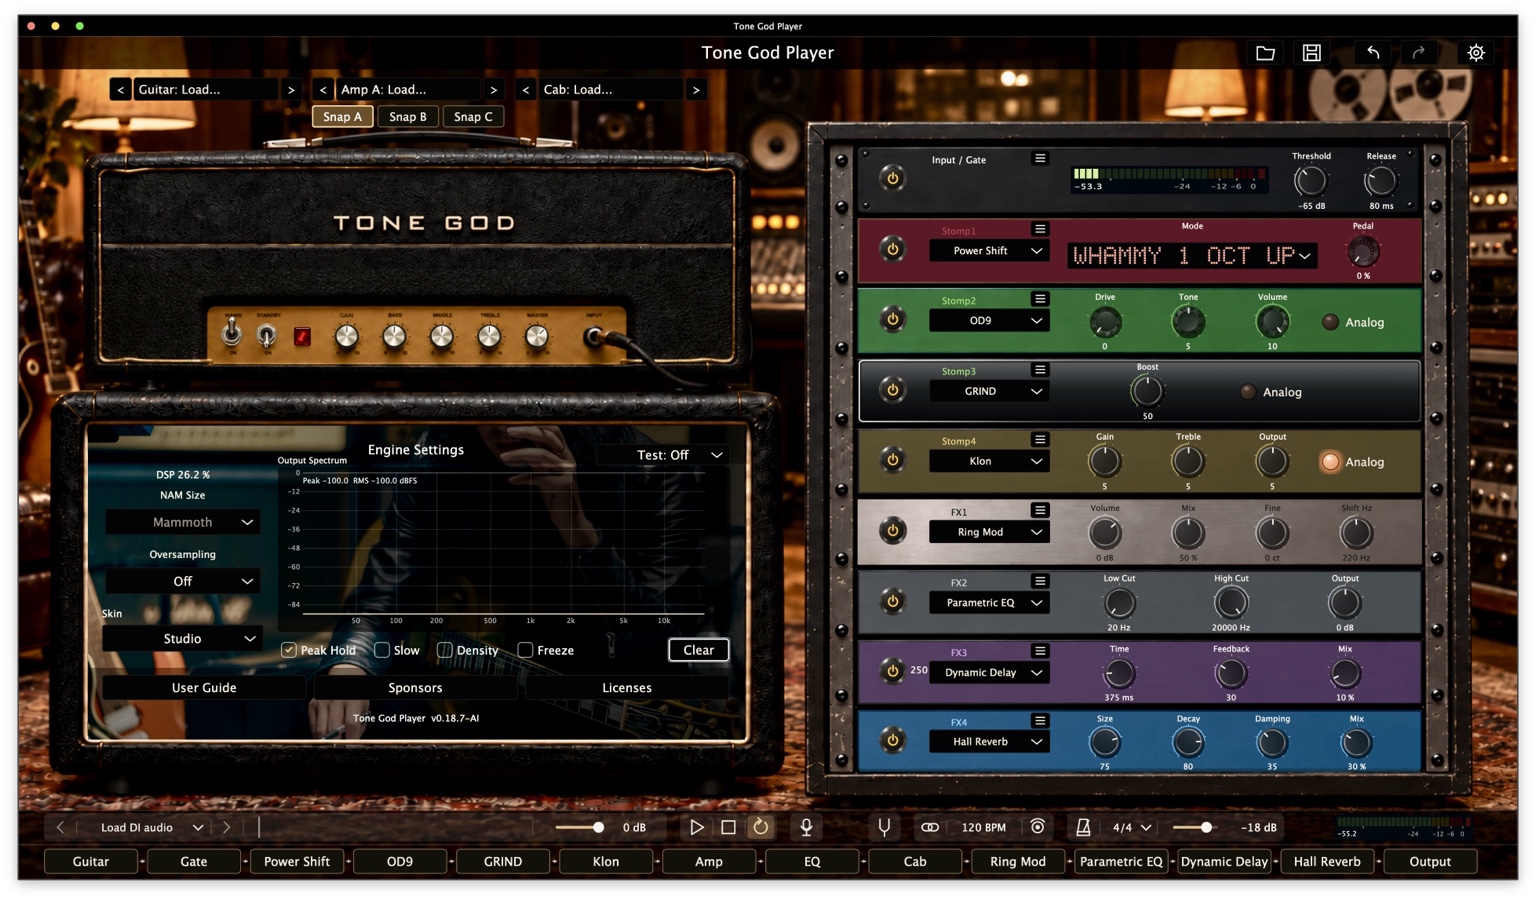
This app screenshot shows Power Shift, OD9, GRIND, Klon, Ring Mod, Parametric EQ, Dynamic Delay and Hall Reverb. Effect settings, pedal control and signal position all shape the rig.
Actual v0.18.7 app screenshot, shown as an effects-interface reference. Rack layout and appearance may differ in the current version.View the full app screenshotShape drive with Gain, adjust brightness with Treble, and set Output to suit the amp input.
Control pitch bends with pedal position, alongside harmony and detune modes. Choose from 21 modes to make pitch part of the performance.
Add a harmony voice with a selected key, scale and interval. Monophonic pitch tracking makes a clear single-note melody the place to start.
Repeat level responds to input dynamics, pulling back while you play and coming forward in the spaces between phrases.
Analog-style delay gives filtered repeats their own color. Set Time, Feedback and Mix to shape the rhythm and depth.
Load a compatible mono NAM pedal model into the rack, place it before or after the amp, and adjust Mix and Volume.
Effect descriptions reflect v0.19.1. The Analog switches on Klon, OD9 and GRIND are circuit-noise options. Sound and pitch-tracking behavior depend on the input, models and settings.
A/B/C share a rack and routing, with separate parameters, switches and model assets. Keep settings for different parts of a song in one workflow.
Map knobs and switches with MIDI Learn, including adjustable ranges and reverse mappings. Use PC Learn to assign MIDI Program Change messages to A/B/C snapshots. Controller mappings stay with effects when you move them.
Load and loop audio files, and use the tuner, Tap Tempo and metronome. The plugin can also follow a valid host BPM.
Save a preset or bundle your tone with its model and IR assets in a .tgpack, ready to edit again later.
Start with an empty rig. Choose your models and build your sound.
Select your interface and guitar input in the standalone Audio Settings. AU and VST3 audio is managed by your host.
Choose files in the Amp and Cab load areas, then adjust Gain, EQ and Output.
Right-click the rack to add effects, assign routing, create A/B/C snapshots and save your preset.
GUITAR TONES · AMP SAMPLING
TONE GOD, known as 痛神 in Chinese, was created by Mori (morimagic). It began with guitar tone creation and amp sampling. Tone packs remain at the heart of the brand, shaped by hands-on playing and recording experience.
That work has grown into tools such as TONE GOD Player and MIDI Bridge, bringing tone use and control closer to a guitarist’s workflow. Player carries that tone-making experience forward. MIDI Bridge is still in development and has not been publicly released.
USD 30 minimum · Pay what you want
Support development and get access to the v0.19.1-AI beta for macOS and Windows through Gumroad.
Support on GumroadUSD 30 minimum; pay more if you wish. See the product page for package details and system requirements.
Current version: v0.19.1-AI. macOS and Windows x64 builds are complete.
Get beta access through the Gumroad support link above.
macOS includes standalone, AU and VST3. Windows x64 includes standalone and VST3, with all 20 automated tests passing. Physical audio interface, ASIO and DAW operation on Windows remain unverified.
Bring compatible amp model files; IRs support WAV and AIFF. Player starts without loading models or audio files automatically, so you can choose your own assets.
This is the TONE GOD Player product website. Use the Player app or plugin for live playing and audio processing.
Need help using Player, or want development and release updates? Contact us through our official social channels.